Showing posts with label I made this. Show all posts

Monday, 24 September 2012

The peplum toile - V8815

I was planning on making up my peplum top straight from the pattern but as usual, the measurements had me totally puzzled. If I went by what was written on the packet, I probably would have made up a size 20, but seeing as I only had the pattern in size B5 (8-16), I figure I'd try my luck with a toile using the largest size (16) using some fabric on hand. I've made Vogue patterns in smaller sizes previously so I wasn't too convinced but I felt a little more reassured by Tracy's version on PatternReview - it looked great and her comments around sizing were on par with what I was hoping to make up.


Check it out - the 16 (also known as a size I've never sewn up, ever!) fits perfectly! What's up with that? I would've been pretty narky if I had actually gone out and bought the larger sized pattern because of the measurements. I did sit there for a bit and think hmmm maybe I just have an odd shaped body but really - it's not THAT weird...

Anyhoo, I'm happy that the toile did fit. I might even try to make this into something wearable - I thought the print would be a bit much for this style of top but it's turned out better than I expected. I'll see how I go, but for now I get to cut up some of the good stuff. *yay*

I'm probably going to make it in boring - I like to think classic hehe - black so it's a bit more versatile and office friendly. I'm still deciding about sleeves vs. no sleeves...

Tuesday, 18 September 2012

Japanese toddler pants

I was given a Japanese pattern book awhile ago (thanks Kaz Kaz!) and as much as I'd like to recommend it to people as a great little book for baby/toddler clothing, I can't read Japanese and this one doesn't have any English on it at all (unlike the famous Stylish Dress Book, which at least has an English title). Here's a picture of the cover at any rate in case anyone wants to do some hunting and/or translating. 


The pants are made out of linen, with the pockets trimmed with some super cute Kokka fabric, which I picked specifically with my little nephew HYB in mind. 


I'm pretty happy with the way they turned out, although I think my lack of Japanese reading skills resulted in slight incorrect measurements - the trouser cuffs don't actually look like cuffs but more like a standard wide hem.

My favourite bit? The super cute pockets! It's the first time I've made rounded pockets and the technique shown in the book of gathering the corners of the pocket bottoms really worked well.


Here's a close up of the pockets attached.

Loving that traffic jam!
I'm tempted to make a matching top out of the Kokka fabric but I suspect it might be a bit too pyjama-top like. Thoughts?

Tuesday, 11 September 2012

Tiny Pocket Tank - the dressy bird version

After a trial run at my first Tiny Pocket Tank, I decided that I was going to make a more upmarket version of this Grainline Studio pattern for a birthday present for my SIL. Something that could be worn both during the day and at night - out shopping or out for drinks. 

Now... upmarket, fashionable, trendy - where would I find the perfect material.... certainly not *gasp* Spotlight surely??

But yes, Spotlight was a winner! Check it out - I fell in love with this print as soon as I saw it! Navy blue, shiny, slinky and with an absolutely gorgeous bird print - how could I say no? 

♥

All I can say is lucky for my SIL I'm a lot bigger than she is because I was very very tempted to keep it for myself. Pointless if really all it fits is my arm and half my head ;) 

Saturday, 11 August 2012

My Tiny Pocket Tank - finally

Work has been kind of ridiculous, which has resulted in minimal crafty goodness. Unfortunately the lack of sewing probably just compounded the general feeling of not-quite-rightness, so I decided to put it right and temporarily borrow a machine for the new place.

There isn't an ideal place for the machine here quite as yet so I've been making do an a bar stool at a kitchen table. The result? A backache, a tiny pocket tank and a huge level of satisfaction that I've finally made something *nod*

Tiny pocket tank - the trial
This is what people tend to call a wearable muslin - I just wanted to see how this as to sew up and I thought I'd use some nice material to test things out. It's turned out well and I got a compliment on it just the other night!

Overall I'm pretty happy (the print is so forgiving!) but my binding could be much improved. I think I'll need to make the next one a size smaller - this just seems a touch big for me. Hopefully by then I have a little crafting corner with my own machine and table *fingers crossed*

Tuesday, 10 July 2012

Something from scraps

It never fails to amaze me how a few scraps of fabric, a needle and some thread can be transformed into something with shape and context.

From this....

Fabric scraps on a string

To this!

Teeny tiny bunting!

Not quite transmogrification a la Calvin and Hobbes, but still pretty impressive to me.

Thursday, 14 June 2012

Reunited!

I'm so happy to be back and reunited with the sewing machine - 16 months without one and I've been hanging out to just make something - anything - HUZZAH!

*beam*

OK you can totally tell I'm excited right? So then - what to make? I was humming and hawing until I was told that the nieces and nephew would all be in the same city in a week or so. Obviously dresses for the girls and for the little fella... well he'd get something store bought (boys clothes are somehow a lot more difficult to deal with!)

The dress for Princess S needed to be just like her - bright and bold - so I picked out a red fabric with huge white polka dots and made it out in her favourite dress design, Butterick B4701, previously made here and here. I finished it off with a subtle daisy chain at the waist. The waist ties have been tied around the back of the dress so you can see the shape in this photo.

Princess S dress

For SY2, I wanted something more subtle and in a print similar to what you might find in Country Road. I ended up choosing a pale yellow with a leaf print, more suitable for the tropics where she lives. To make this dress I used the Get Creative: 4006 pattern I've used previously here and here - and altered it from the version modelled by Princess S by removing the V cutout in the neck, inserting a zipper and lining the bodice in a similar manner to the Butterick dress above. Waist ties also tied up around the back here.

SY2 dress
Very happy with how both dresses turned out - but I have to admit it was a bit slow going after not having sewn anything for 16+ months. I had to even stop to think about how to rethread my bobbin for a bit!

I'm hoping this means the end of the sewing drought for awhile :)

Saturday, 14 May 2011

Blog Poll and the Results

I haven't blogged since December - terrible I know - and other than the standard reasons of lack of time and general malaise, I found that the more I didn't blog, the harder it was to come back to it because I felt like I had to play catch up for the things I missed. Obviously the longer I'm slack the more there is to write about, which then makes me feel more reluctant... and so cycle goes.

Also, since relocating to Hong Kong, I've done absolutely zilch in the sewing stakes. I know the blog is called 'SuBoo: sewing and stuff', and a lot of 'stuff' has been happening, but I somehow feel guilty about neglecting the first part. It's almost like I feel like I'm lying if that makes any sense.

So. To just get over it all, I used Facebook Questions to see what my friends thought about it all.

The results were interesting - and the friends who read my blog most regularly and also have blogs of their own were the ones who wanted me to play blog catch-up (totally understandable!), but after having the question up for voting for a week, the winner was option 1 - 'Pretend the last 4 months didn't exist and start new posts from today'.

Am I relieved? If I'm being honest, yes! 4-5 months is a huuuuge effort to catch up on and I'm pretty sure I mentioned the word 'malaise' previously somewhere... so from this post onwards, I'll be posting a little more about 'stuff', and who knows, some of the stuff that happened earlier this year might make its way in here...

Thanks for voting peeps!

Sunday, 28 November 2010

Neckie the giraffe

Now my previous post about soft fill was probably a bit mysterious, but all for a good reason. I was making a surprise for Frannie for her birthday! Seeing as she reads this blog regularly I didn't want to give the game away.

I had already gotten her a copy of the super awesome Zakka Sewing craft book but if time permitted I was going to try to make up a Mrs Perkins giraffe for her since I really didn't want her stealing mine.

It was a bit of a mad rush - and gee those horns always get me - but I made it!

Girl or boy? Hmmm...

I wasn't sure if the giraffe was going to be a boy or a girl so I picked fairly neutral colours - beige with a light white pattern for the body and a very pale turquoise for the feet and horns.

Matchy-matchy

Can you see a bit of a colour theme happening with the wrapping paper? I've never felt quite so coordinated ;)

I added a bit of the matching ribbon around the giraffe neck (gifts should be at least partially wrapped don't you think? heehee) and we were ready to go.

After a rather lovely meal at Maze (thanks again Frannie!) the gifts were opened.

Hurrah! New friends!

Coined with the apt name of Neckie, it was decided that she was a female giraffe. Although it wasn't my intention, Ray pointed out that Neckie was really channelling Tiffany & Co, what with her (almost) duck egg blue ribbon and mane colouring.

What can I say? The girl has high standards ;)

HAPPY BIRTHDAY FRANNIE! x

***EDIT - click here if you want to see how Neckie is settling in to her new home***

Saturday, 27 November 2010

Pretty paper

I love pretty wrapping paper. It can seem like such a waste though when it ends up getting crushed, crinkled and ripped up, especially with some of the prices being charged these days. I know I'd much rather put my pennies towards the gift itself rather than the package it comes in!

Cue a rubber stamp, an inkpad and a roll of white paper.

I loooove the colour of the ink

Just repeat as you see fit and *stampstampstamp*, a sheet of pretty wrapping paper!

Tuesday, 2 November 2010

Superhero Blee

A long overdue birthday present started to sort itself after I found this fun flannel print.

I whipped them up into some PJ pants (cropped, in case you were wondering why they look so wide - and no he's not a midget even though there has been talk of a height complex...)

And added a personalised touch - just for Blee.

Hope he likes them.

Wednesday, 15 September 2010

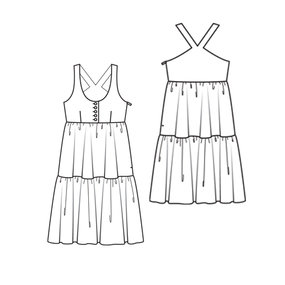
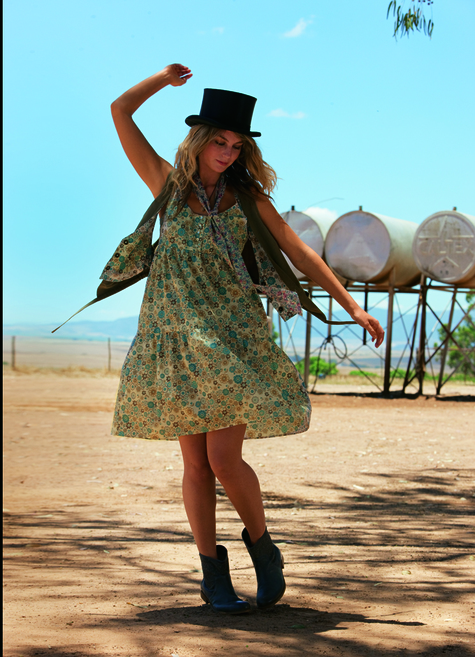
My first burdastyle dress: 5/2010 Tiered Mini Dress

I did have grand plans to make my first ever BurdaStyle attempt the One Dot Dress, but when I read the instructions a little better I realised that I didn't have a double stitch needle and even if I did, I wasn't sure where the second spool would sit on my sewing machine.

Due to my general impatience, I put that one in the 'think-about-it-later' pile and instead decided on pattern 114 from the 5/2010 issue, a tiered mini dress.

As you can see, it's a great summer dress and Burda had it made up in a really nice Liberty print.

Photo courtesy of burdastyle

Seeing as quite a few people have said that Burda patterns aren't the easiest to follow, I wasn't going to splurge on expensive material and instead picked up some similarly patterned cotton from Spotlight.

After a bit of confusion around how the front buttonholes were supposed to work, I managed to figure it out:

The finished product (slightly crinkled)

I have to say that I was a little disappointed initially that the dress looks a little pregnant-y, but it's nothing a high-waisted belt won't fix. You just don't notice it too much on the Burda model since they've shown an action shot.

Perhaps it's my choice of material but I think that the darker material has taken a bit of the summer-y feel away from the dress.

Front and back.

Also not too sure about the cross-back - I have a sneaking suspicion that it might make most people look like they have swimmers' shoulders - but that aside, this design means that normal bras can't be worn without having the straps fully exposed. Not a great look.

As I mentioned, I wasn't sure what I was supposed to do with the buttonholes so I figured since the design had an invisible zip right up one side (talk about zipper foot issues!), the dress front didn't actually need to button up, so I ladder stitched the 2 front sections together and sewed on 3 buttons just for appearances. This bit probably took me almost as long as it did to sew up the rest of the dress!

Fake buttons

Overall I'm pretty happy with the dress for a first attempt but I wouldn't mind making a better version of this, with just one front section for the bust and removing the cross back. I've also found that the skirt section is very see-through as it isn't lined, so that might be something to consider next time.

Sunday, 1 August 2010

The Macaron

It's finally finished!

Ta-dah! Sneaky front pockets

Actually I finished this a week ago but only got the chance to wear it today and take some photos. I could have just posted a photo of the dress on the hanger but it looks pretty average and shapeless without a body to pad it out.

As a precursor to the post I'd like to say that the photos in this post don't do justice to the dress - mainly because every crease and wrinkle shows up in these photos due to my (poor) material choice - and these aren't anywhere near as obvious in real life.

Material
I used a black cotton-and-something blend with a slight sheen to it for the contrast to complement the black and white patterned mid-to-heavy weight cotton/lycra (I suspect it must be something like this since it has a fair amount of stretch if you tug at it) that I had picked for the body of the dress. I also used a black 16" invisible zip to finish.


Pattern (Colette Patterns: Macaron dress)
I did the right thing this time and made a muslin to make sure that I got the sizing right on this, and as per standard opinion, the Colette sizing was pretty much bang on.

The pattern was overall very straightforward, but when it came to the sleeves I ended up ignoring the instructions - they were confusing and the diagram confused me more than anything.

I was pretty excited with some aspects of the pattern as it marked 2 'firsts' for me - an invisible zip and a blind hem.

Not bad for a first attempt at the invisible zip

Both techniques were achievable after a bit of practice but it took me a bit of time to work out that I could actually put in the invisible zip without a special foot for my machine, contrary to popular opinion. This video definitely helped.

I don't know that the blind hem was the most suitable finish for the dress but I suspect that the stiffness of my fabric has something to do with this opinion.


Would I do it again?
I definitely want to make this again, using different materials. The photos below give you an idea of how the dress hangs and I'm slightly disappointed with how creased the dress is after 15 minutes of wear. The fake sweetheart neckline also doesn't hang very well. I thought that the heaviness of the material would mean that it would sit well on the bust but instead it seems to have resulted in some creasing.


Enough creasing there??


The sweetheart seam could sit a little better - and the creasing! *AUGH*

So yes, the creasing is bothering me to no end, which is really quite frustrating seeing as I spent a fair amount of time on the dress making sure that I had fnished all my seams well and taking a lot of time to practice with the blind hemming and the zip. I think next time I'll look to do this in lighter cotton materials next time - maybe in summer brights since we're now in the last month of winter *hurrah*!

Thursday, 15 July 2010

Why am I so slow (or Ruffled Skirt No 3 - by request)

Now that Princess S can fit into it, she has decided that she must have a red version of the ruffled skirt I made for her awhile back.

I have been informed that there are several reasons for this request:
1) The ruffles on the skirt make it extra twirly (this is very important)
2) The red colour will fit perfectly as an underlayer to a fairy skirt (gauze and thus fairly see-through)
3) The combination of the skirt ruffles and the gauze will mean the overall fairy effect will be even more sticky-outy (gotta love synergy!)

So here it is. The ruffled skirt for the third time.


One would think that after making it 3 times I'd be super speedy with it, but no. It still takes me a couple of hours at least of faffing about before it's done.

Why oh why am I so slow?

Maybe it's because I watch shows on my laptop while trying to sew. Or maybe it's because I am playing 3 games of Words with Friends (a Scrabble rip-off) on my iPhone and keep checking to see if my opponents have made a move. Or maybe because I stop for a snack break every 5 minutes.

I guess everyone has different sewing habits and it's a case of doing whatever you are comfortable with. Unfortunately mine aren't very efficient!

Saturday, 26 June 2010

A (not-so) simple skirt

I was randomly surfing the net the other day in the hopes of getting some sort of inspiration when I came across this little DIY gem on how to make a simple skirt with an elasticised waist.

The tutorial looked simple enough and was pretty much perfect for a speedy feel-good project so after a quick trip to the shops I found myself armed with a lovely length of miscellaneous grey knit (suspected flannel stretch of some kind but the tag was missing) and some black elastic.

The fabric looks perfect for winter

I figured the skirt would take me an hour or two seeing as I haven't really worked with knits before. This was factoring in the measuring, cutting and sewing. What I hadn't anticipated though was having to redo the stitching of the skirt. After gathering the skirt and pinning it to the elastic, I straight stitched the two parts together. All seemed well until I went to try the skirt on and I heard a big riiiip! Stretching the elastic had busted the seams!

When I thought about it later it did make sense as the seams weren't going to be stretching along with the elastic but as nothing was said in the tutorial I just went along with my standard stitch. Probably a silly newbie mistake on my part, so I made sure that when I was sewing the band to the skirt a second time around I used a straight stitch and then reinforced it with a zig-zag stitch, both of which were sewn on while I stretched out the elastic band.

Looking oh-so-innocent on the hanger

Other than my newbie mistake though, I had a terrible time with this one. My machine decided to suddenly act like an item possessed. My needle broke, my bobbin jammed a bunch and my thread snapped 6 times. I was close to just calling it quits but there is a stubborn streak in me that kept persevering. No machine shall best me *shakes fist*.

Anyhoo after all of that, I worked out that the thread I was using was a cheap and nasty spool that had been lurking in my thread box for a long time. Annoying.

Unfinished 'chic' (at least I'm hoping it is)

I didn't bother hemming the bottom of the skirt. I had made it a point when cutting to use the selvedge for the base of the skirt since it was such a simple *cough* skirt and I wanted to stay with that simplicity. Or I could just have been being lazy. Either way you can see the ends here look unfinished but I have had confirmation from workmates that it looks like it was styled that way on purpose, so I'm not doing any more work on it!

Moral of the story? Chuck out all of your cheap thread! It is EVIL.

Oh and if I do decide to make another one of these - the elastic band needs to be a lot wider. I thought it was fairly wide when I purchased it but now that the skirt is made up, I'd prefer it to be at least 2 times the width.

Saturday, 19 June 2010

Still not quite back into it... but for good reasons!

A glorious 4-day weekend away to celebrate my birthday in sunshine has not helped the sewing mojo at all. I just want to go back! Unfortunately a girl needs to be cashed up enough to buy fabric (and shoes!) so I'm back at work. In the cold. *sob*

I've also been a little sleep-deprived due to a little event called the World Cup (Go Socceroos!) with matches occuring when I am generally supposed to be sleeping so I'm actually amazed I finished up some bibs today. They are pretty much the same as the first lot I made but this time around I used Velcro mini dots instead of snap buttons. I was told that this would make it a lot easier to get the bibs on and off, and I have to say that not having to use a hammer and deal with spiky metal bits is always a good thing.


Also I received this pic of Princess S wearing the ruffled skirt that I made. I have to say I was quite surprised she was wearing it since it's winter over here and it's a summer skirt but check out her layering skills ;)


Seeing her wearing it is a good reminder that I need to get off my behind and start some serious sewing - I've promised her a dress and matching bag.

But in the meantime - the Australia vs Ghana match starts in 20 minutes and friends have arrived with a belated birthday cake and wine so I'm off!

Sunday, 9 May 2010

I'm not sure what sounds giraffes make...

... but this one says hi!

I know I was quick in getting started, but I've only just managed to finish of my version of Mrs Perkins using the pattern I bought last week.

I think I underestimated the amount of work required to make up a softie, or maybe it's because I suck at hand sewing, but ta-dah!


Things I learned while making my first soft toy:
1. I am very sloooow at hand-sewing
2. Stuffing certain shapes require stuffing, re-stuffing and then sometimes de-stuffing to get things padded out evenly
3. You use a lot more stuffing than you expect
4. Ladder-stitching isn't too hard once you watch a YouTube video about it
5. Sometimes patterns really could be explained a little better - so read them over three times, and then three times again
6. Doll making needles are long for a reason - I only just made do with some tapestry ones I bought because the giraffe had a relatively thin frame. I'm glad I didn't choose to make an elephant first up!
7. The Mentalist isn't a bad show (I watched about 5 episodes over the course of giraffe creation) - it is quite entertaining and Simon Baker-Denny sure has come a long way from dancing in with no shirt on in video clips

I definitely have areas to improve - right now this little giraffe has slightly lumpy legs (even if I did go about with Point 2 above several times) so I'm going to have to work on that. I also need to get better and faster with the hand-stitching as this was quite time consuming even if it didn't seem to be the case from reading over the pattern.

I love how cute it is though - and I'm already getting excited thinking about other colour combinations I could put together!

Wednesday, 14 April 2010

Bibs for Bubs

Check out the bibs I made. They were surprisingly easy to make - I think the most difficult bit was selecting which materials to use to go along with my spotty pink flannel backing (proudly recycled from some PJ pants that were too holey to do anything else with).
I used the template from one of the books I bought awhile back, 'Bend-The-Rules Sewing', followed the instructions and voila!

The only changes I made was to add another layer of white cotton in the middle of the bib, mainly for aesthetic reasons as the spotty pink flannel was showing through the white cotton on the other side, making it harder to appreciate the pink fairies and pink and blue stars.

I was really torn as to which side was front - so I attached my snap fasteners to different sides on each bib and I'll leave it up to the Mummy to co-ordinate with bubba's outfit for the day.

I'll be making more of these.

Monday, 5 April 2010

Easter Monday Macaroons

I thought I'd take advantage of the long Easter weekend to do a bit of catching up with friends, so Kimba and I nominated Easter Monday as our day of baking macaroons. I had had a very yummy one from Laurent when I went up to Sydney last week but it was a reminder that regardedless of where you are, if you want to eat a good macaroon, it's going to cost, so I thought it'd be great if we could just bake them up at home.

I had heard that making macaroons wasn't difficult *YAY* but making good macaroons was *eep*. Armed with that bit of information, we went into it knowing that at the very least, we'd have something edible!

Kimba found a couple of recipes online and printed them out, and with a bit of guidance from our own personal masterchef Cindy, we decided to combine the recipes and go with 2 batches - chocolate and vanilla - partly because they are generally liked flavours but mainly because we didn't have the ingredients to make orange or raspberry ones (we're maybe not so great with the forward planning).


The frothy peaks of whipped egg whites... so shiny!

As we progressed, we had some surprise visitors drop in so our group of 2 bakers and masterchef doubled in size - perfect timing to help with the various stirring, mixing and piping jobs that were available. No work no food!


Sifting the almond meal

Following the instructions, we piped out our macaroon mix to a 1.5cm ball size, expecting them to expand.


Masterful piping

They did not.

As they were baking and not expanding we decided to take sizing into our own hands and piped out the next lot into (rather large) escargot shapes which once baked, looked a lot like... well escargot shaped baked goods.

After the macaroons had cooled and we had whipped up the butter icing for the vanilla macaroons and the ganache for the chocolate ones, assembly began. As you can see from the pictures, visually our mini-macaroons looked almost like the real things but they were a little over-baked (I suspect due to their small size they baked a lot quicked than we expected), so they weren't too chewy on the inside.


Our pretty mini-macaroons. Almost perfect!

Our giant escargot-style macaroons were very goo-ey, but pretty much went the other way and didn't have the firm, slightly crunchy outside that we were hoping for, but they sure tasted good!


Our escargot macaroons. It was pointed out that the chocolate ones bore a rather strong resemblance to something stinky...

Considering it was a first time effort, we were pretty happy with how they turned out, especially since we pretty much had no idea what we were doing. Lots of lessons learned for next time - and lots of happy full tummies in the meantime.

Wednesday, 31 March 2010

Get Creative 4006: Little Girls' Dresses - modelled by Princess S

As the title suggests, I've gotten Princess S to model the dress I made for her not too long ago.

Note the model-ly pose on the left. Love it!


Feedback was that it was a bit of an effort to get her arms through the armholes and that the dress could really do with a zip somewhere so it would be easier to put on. Obviously this wasn't part of the original pattern but I'll look into it when I make the next one.

Seeing as the pattern size I used was for a 4-year-old and she's 3.5 years right now, I'm both surprised and grateful that it actually fits her. A previous size 4 dress that I'd made for her is now too small to fit so if I'm going to make another dress from this pattern for her, it better happen soon!

Friday, 26 March 2010

Get Creative 4006: Little Girls' Dresses

Using the same pattern as I did for the little girl's top/pinafore I made previously, I went ahead with my plans of making a some dresses for Princess S and Little Miss M.

Being housebound for a week with the flu gave me time to cut up the fabric and make up the dresses, but I must say they were a real effort seeing as even picking up the scissors was super tiring in the state that I was in.

After sifting through my stash I decided the dresses were both going to have polka dots. I started with the smaller dress first for Little Miss M - the top/pinafore I previously made for her using the 6 month old sizing fits her perfectly right now, so I decided that since winter is approaching I'd be better off making it for a 1 year old so it'll be ready for her to wear when the weather warms up again (or when she moves back to the tropics, whichever comes first). Instead of the typical pink combinations that lots of little girls wear, I thought I'd make it up in a bold blue/brown fabric.


I then moved on to the 4 year old version for Princess S in her favourite colour pink, accented with a variety of gelati coloured spots.


Here's my rundown:

Material
I used 100% quilting cotton with polka dots for both dresses. The pattern called for ric-rac to edge the dresses, but I went with no notions (mainly due to being unable to leave the house to go shopping!)
Plain white/pale blue thread was used for the stitching, depending on the dress colour.

Pattern (Get Creative 4006 : View B)
This view of the pattern was fairly easy to follow, with the only exception being that some of the steps were misnumbered in the instructions. I finished the blue dress as per instructions, but I have to say that I really didn't like having to finish off the sleeves with bias-binding. I made the binding myself, but ended up doing a long and messy job of it. I probably need more practice with this, but to speed things up with the pink dress, I omitted the binding and instead zig-zagged the armholes and finished them with a narrow hem. I also omitted the ric-rac as mentioned above.
Note the inside and outside of the armhole, done my way
(excuse the slightly crooked stitching *ahem*)

Would I do it again?
After making this up twice, I'm a lot more confident in what areas of the dress I would change if I made it up again (i.e. changing the armhole finishings). I'm sure you will all agree that making something up the second time around can make a big difference in how long it takes and what it ends up looking like - unfortunately for me I tend to get bored of making the same thing over and over - but in this case I'll probably try this again with the ric-rac trim to see how it looks if it looks good on the girls.


***EDIT*** (31/03/10)
The dress looks pretty good on, but apparently it is a little hard to get on and off. I think the next one may need a zip added.
***END***